|
Up until now, restoration of Waterman safety pens has typically been categorized as advanced repair. No longer! The difficult part has always been cutting and fitting a new thin-walled cork seal, but now two or three fluorocarbon rubber O-rings can be used instead. We recommend slightly roughening the inside bearing surfaces of these O-ring seals with fine sandpaper for better grease retention and reduced stiction. A few easily-made tools make installation a snap -- to the point that the most time-consuming operation becomes cleaning old ink from the pen's innards.
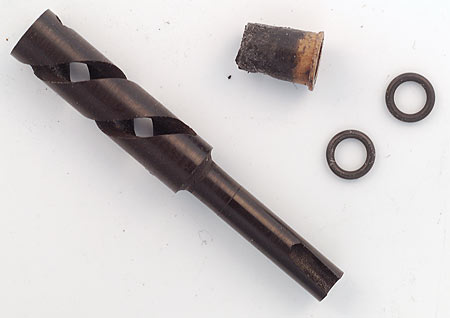
Spiral, original cork seal, replacement O-ring seals First, uncap the pen and extend the nib by turning the end knob clockwise. If the mechanism is stuck, try holding the pen nib down and gently turning the end knob slightly back and forth. This will often wiggle a stuck mechanism loose. A few drops of water introduced with an eyedropper may also help, but too much will lead to an inky mess.
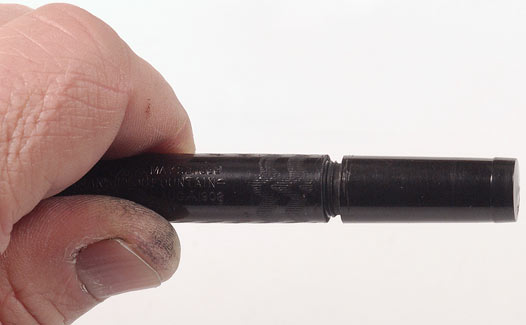
With the nib extended, grip the packing holder and unscrew it from the barrel. Warming the joint may be necessary before torque is applied. Try to grip the barrel and packing holder only, and not the end knob. The reason for this, and for extending the nib first, if possible, is to minimize stress on the internal "spiral" (actually, a helix), which is easily cracked. As you unscrew the packing holder, the nib will probably retract into the barrel. Extend it again by turning the end knob before continuing the unscrewing motion. This is again to reduce stress on a mechanism that may well be jammed by dried ink. Once the packing holder is unscrewed, pull it away from the barrel very slowly and gently, and low over your work surface. The cross pin that connects the nib carrier and the spiral is small and prone to fall out and get lost. Once you have pulled out the innards, push out that cross pin and put it somewhere safe. If it does not come out easily, put a little water on it to dissolved any caked-on ink, and apply gentle heat to prevent cracking of the hole in the nib carrier. Again, take great care not to let the pin fall out and get lost.
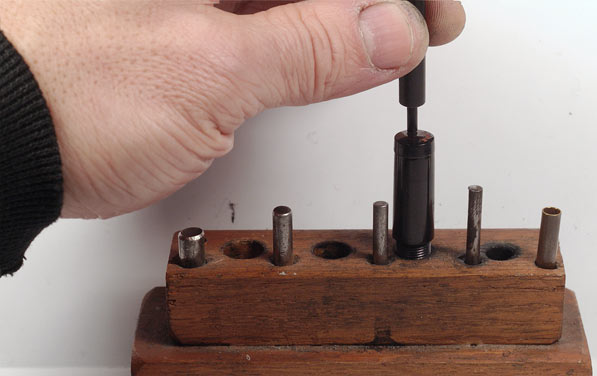
Take a pin punch made of some nonmarring material such as nylon or Delrin and drive out the center shaft from the end knob. Support the packing holder in a knockout block with plenty of clearance for the spiral. Make sure the tip of the punch rests against the end of the shaft only, and not against the wedging pin that prevents the end knob from turning in relation to the shaft.
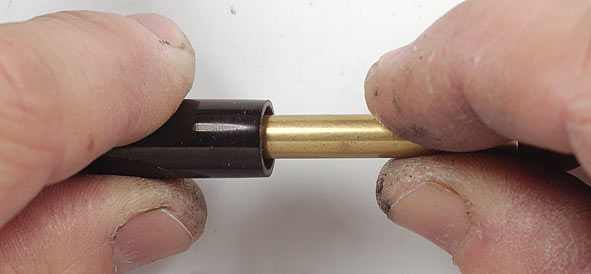
Once the shaft has been driven free of the end knob, be careful not to lose the wedging pin. It will probably remain in place in the end knob, but handle it gently so it does not fall out and get lost. Clean the nib assembly and spiral, using a rubber bulb to blow water through the feed channels to make sure they are clear. Clean out the inside of the barrel with a test-tube brush. Protect the outside of the barrel from getting wet, both when cleaning and when rinsing. Clean out the old cork seal from the inside of the packing housing. Use a cotton swab to clean out old ink residue in the shaft hole and on the face of the threaded plug that fits into the barrel. Put the spiral back into the packing housing. Put a little silicone grease onto the spiral's shaft, then slip on an O-ring, lightly greasing its exterior. Push it into place, using a short section of metal tubing to push it into position. For most pens, the tubing should be 7/32 inch diameter; for #6-size pens, use 1/4 inch tubing, and for #8-size, 9/32 inch. The ring will easily slide along until it reaches the narrow recess into which it must be pressed, after which more pressure and a little coaxing may be required. Once the first ring is fully inserted, repeat with a second. A third will usually be required in order to have sufficient turning resistance to prevent the nib from being pushed back into the barrel in use.
Carefully pick up the end knob, taking care not to dislodge the wedging pin. If the pin's face is slightly below that of the knob, gently push it up from underneath until it is level with or slightly above the knob's surface. Push the knob down onto the shaft, taking care to align the wedging pin with the matching cutout on the shaft. You may be able to push it all the way back into place by hand, but this can put excessive pressure on the spiral. Take a metal rod that will fit down the center of the spiral, and use it with a small hammer to gently tap the shaft down into the knob, letting the knob rest against a flat, firm surface such as a block of wood (metal increases the risk of cracking). Reassemble nib assembly and spiral, reinserting the cross pin. Insert all of the internal bits back into the barrel, taking care once again not to let the cross pin fall out. Apply sealant to the packing holder threads, then screw into barrel. Once again, to reduce strain on the spiral, you may wish to turn the end knob before screwing the packing housing and barrel together. In this case, you will turn the knob counterclockwise before turning the packing housing clockwise. Suction test for leakage, and you're done. Don't forget to clean out the inside of the cap. NOTE: Waterman safeties from the first few years of production are built quite differently, with helical tracks inside the barrel, a turning knob extension with straight longitudinal tracks, and a very narrow, threaded, turning knob. It is not advisable to attempt seal replacement on these rare, early pens, for opening up the packing housing poses an unacceptably high risk to the extremely fragile turning knob, and in particular, to its overly thin threaded flange. More Waterman safety info here. Packing unit O-ring seals for Waterman safeties up to #5-size available here. Seals for larger models to be listed shortly. |