|
Sheaffer's "Touchdown" filling system was introduced in 1949, and was used for a wide range of models over the following decades. The famed Snorkel and PFM were both Touchdown-fillers, as were many Imperials. Touchdown-filling pens use a conventional sac, which is flattened when the plunger tube is depressed, compressing the air inside the barrel. At the bottom of the stroke, the pressure inside the barrel is automatically released, allowing the sac to expand and fill.
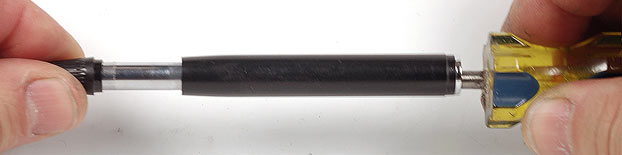
Touchdown fillers are very easy to service. The section unscrews from the barrel. Gentle heating of the joint may be required to soften the thread sealant. Access to the O-ring seal at the back of the barrel requires removal of the plunger. Use a small screwdriver to remove the screw holding the end knob to the plunger. Do NOT attempt to turn the end knob while holding the plunger tube, since the end of the tube is square, as is the matching end knob recess! (and upon reassembly, slip the plunger into the end knob BEFORE you start putting the screw back in place)
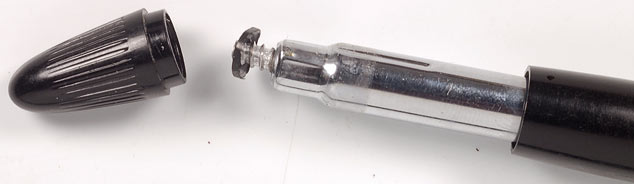
Once the screw is removed, the end knob should slide right off. In most cases there will be a small rubber washer seal between the plunger tube and the end knob (often it will stay stuck inside the end knob recess; less commonly, it will be under the head of the screw, inside the plunger). Do not lose this washer! If you do, you can always make a new one using hole punches and a bit of scrap rubber from an old ink sac.
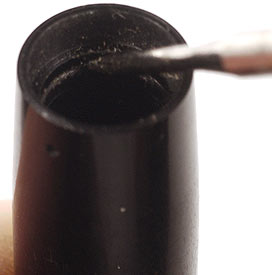
Push the plunger down into and out of the barrel. You will now be able to see the old O-ring inside the barrel. It will probably be hardened with age, and will have to be pried out. Go slowly and carefully, as the barrel wall is very thin. A pointed tool is too easy to push through the barrel wall by mistake -- a fine-tipped jeweler's screwdriver is a much better choice, which acts like a miniature pry bar. If the old O-ring is very hard, you may wish to soak it overnight, or longer. Once the old O-ring is removed, clean out the barrel interior carefully, including the O-ring recess. Take the new O-ring, give it a thin wipe with pure silicone grease, and push it into place. It may take a little careful prodding and persuasion. Put a little silicone grease on the plunger shaft, replace it, and reattach the end knob, making sure that the little rubber washer hasn't gone astray. Be careful in tightening the screw upon reassembly, as it will strip out if turned with too much torque.
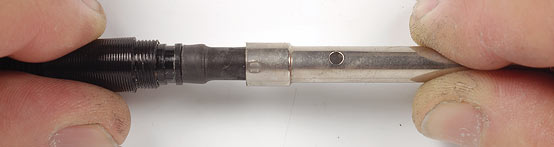
Replacing the sac is comparatively easy. The sac is covered by a metal protector, which is a simple press fit onto the section. Slender Touchdowns, which are the most common, use a #15 sac. Touchdown Tuckaways and first-year Touchdowns are thicker pens, which use a #17½ sac. PFMs use the same size sac, while Snorkels take a #14 -- but both Snorkels and PFMs have a very different sac protector design, so the sac replacement instructions here do not apply. Thin-walled sacs are NOT recommended (more on this topic here).
In most cases the old sac will come right out, but sometimes it will have hardened and/or adhered to the inside of the sac protector. The remains of the old sac can be pushed or scraped out using a metal rod inserted through the end hole. Don't use too much force, as the protector walls are thin, and if they get deformed the filler plunger will bind. Heating the sac protector will soften the old sac residue, making removal much easier. It does get smelly once it starts to soften, so be warned! A properly-sized drill, held in the fingers, can also help clean out a fouled sac protector. Once the sac protector is cleaned out, sac replacement is the same as for any other sac pen. Make sure the section nipple is clean, and shellac on the new sac, dust it with talc, and replace the sac protector. Apply a little shellac or section sealant to the section threads, reassemble the pen, and you are done. Snorkel & PFM repair, Touchdown & Snorkel Profile, Touchdowns & Snorkels for sale, Repair Supplies |